Integration tests with Testcafe on Gitlab.com
Introduction
in modern development projects it is crucial to always deliver the latest available version in a fast and reliable way. Your clients will love it when there is the opportunity to see how the project is coming along in near real time. For that we will need an automated way of building and deploying the application on a production server. That is the magic of continuous integration. The risk of continuous integration is the ability to deploy unfinished or simply broken code. To avoid breaking your existing product and fixating your requirements we will use integration testing as the last barrier before going live.
A successful testing strategy I always use in my projects is based on: Unit testing with additional Integration tests. So most functionality is covered by unit test and the remaining part is tested in an integration phase. Since integration tests need a long time to execute I normally minimize the amount of test running in this phase. For further optimization I don't want to run them locally since they take that much longer.
By combining these two points and moving the execution of integration tests, away from your local development machine, on the build server we save time and enhance our build process with additional tests.
In this article we will build a spring boot application with maven, running the integration test locally, pushing it to gitlab and finally running the tests on the build server. Also called a runner.
Working sample
To get the provided sample please fork the provided repository at gitlab.
integration testing with testcafe
The framework of my choice for integration testing is Testcafe. It is an massive enhancement over the more traditional way of writing integration test with
selenium and webdriver. You can write your tests using javascript and they are providing a neat api which automatically waits for most of your html elements. Normally
there is no need to write massive amounts of implicit and explicits waits in your test code for which selenium is known for.
I come across only one instance where I have to manually wait for an html element to become clickable. It is also
possible to write your tests with the known Page Object Pattern to make them more robust and easy to maintain.
For more information about writing tests with Testcafe please visit the excellent documentation.
continuous integration with gitlab.com
For hosting our source code we have chosen gitlab.com because they provide free private repositories and most important a free (like actually free) continuous integration environment which is quite easy to set up and maintain. We will see how you can configure the continuous integration environment in a moment.
prerequisites
To move along we will need following programs.
- maven
- openjdk
- npm
- testcafe
- git
- a browser
To install all the above on ubuntu enter the following commands. These will install all needed dependencies globally on your system
sudo apt-get install openjdk-8-jdk maven git npm
sudo npm install -g testcafe
After you created your account on gitlab checkout the project in your desired destination folder.
git clone git@gitlab.com:dwasilew/testcafe-gitlab-sample.gitafter cloning is finished you should navigate to the directory testcafe-gitlab-sample and execute a maven build with:
mvn clean verifyif everything works there should be no errors in the output and the target folder should contain a file called testcafe-sample-0.0.1-SNAPSHOT.jar This file is needed to actually start the application. Before continuing to running the integration test execute the next command and point your browser to localhost:8080. This should start the server and we will see our simple todo application.
java -jar target/testcafe-sample-0.0.1-SNAPSHOT.jar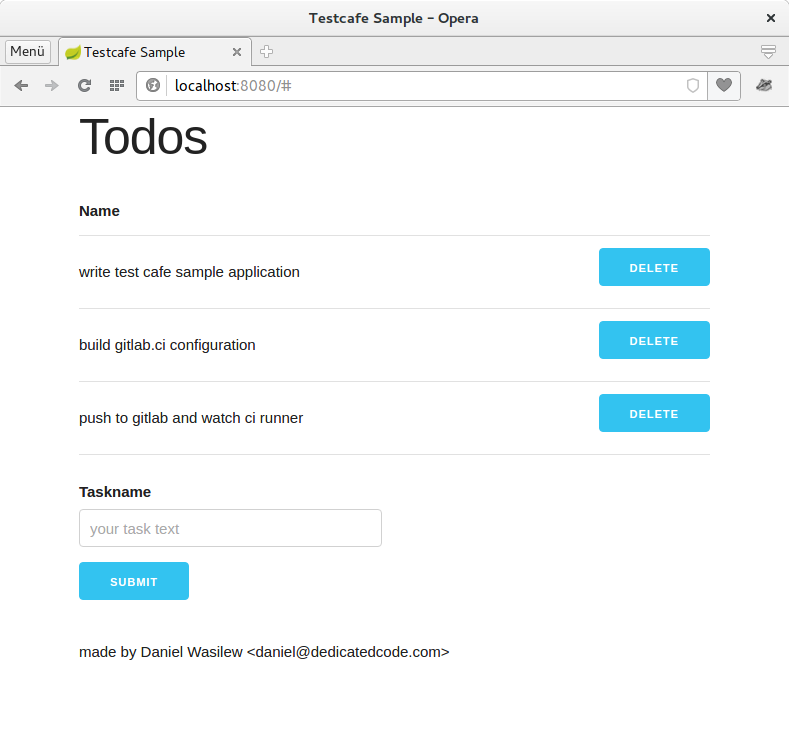
project structure
After successfully starting the application it is time to learn something about the project structure. The sample project is a typical maven project with src and test structure. The on difference is the additional folder integration-test in src/main. In that folder everything related to integration testing is provided. fixtures holds all test files and pages holds our PageObjects.
Fixtures
A fixture holds all tests regarding one functionality. In our simple project all tests a in the Main.js file.
import {Selector} from "testcafe";
import {Index} from "../pages/StartPage";

fixture `Sample Test`
    .page `http://localhost:8080/`;

const index = new Index();

test('should create new todo', async t => {

    await index.addTodo("test todo");

    let location = await t.eval(() => window.location);
    await t.expect(location.pathname).eql('/');

    await index.containsTodo("test todo");
});

test('should delete todo', async t => {

    await index.addTodo("to delete todo");
    await index.containsTodo("to delete todo");
    await index.deleteTodo("to delete todo");
    await index.containsTodoNot("to delete todo");
});
Pages
A page holds all functionality to interact with a page or a set of pages. Since we only have on page in our application we also have only one page object. You can also import t from testcafe so we don't need to pass that around.
import {Selector, t} from "testcafe";

export class Index {
    constructor() {
        this.todoTable = Selector('#todo_table');
        this.newTodoInput = Selector('form input[name="name"]');
        this.newTodoButton = Selector('form input[type="submit"]');

        this.addTodo = async function (name) {
            await t.typeText(this.newTodoInput, name).click(this.newTodoButton);
        };

        this.deleteTodo = async function (name) {
            let deleteLink = this.todoTable.find('tr').withText(name).find('a');
            await t.click(deleteLink);
        };

        this.containsTodo = async function (name) {
            await t.expect(this.todoTable.find('td').withText(name).visible).ok();
        };

        this.containsTodoNot = async function (name) {
            await t.expect(this.todoTable.find('td').withText(name).exists).notOk()
        }
    }
}
Connecting all together and running the tests.
After we have declared our page objects we can then import them in our fixtures. See the following line in Main.js
2: import {Index} from "../pages/StartPage";
...
7: const index = new Index();
There our imported class is included and initiated. In our tests we now have the opportunity to call the provided functionality and even make the asserts in the page object. I usually trie to move all interactions with a page into the page objects so the tests becomes free of any selectors. But your mileage may vary and if you dont have a page where many changes are expected it also can be ok to discard the page objects and simply select everything in the test. Your bet.
Running the tests is pretty easy with testcafe. First you should start the application if it is not running anymore. Then execute the next command in the main folder.
testcafe chrome src/main/integration-tests/fixtures/*This will open chrome and execute all tests defined in fixtures/. If you want to run the tests with another browser just replace chrome with your browser of choice or even, to simultaneously run them in all supported browser, with all.
beyond "works on my machine"
To continuously test your application on every push to master or your desired branch we have to instruct gitlab to build and test the application. Gitlab provides us with a simple way of creating a buildchain. Simply add the file .gitlab-ci.yml. After the chain is defined we can then simply push our changes and everything gets executed on so called runners.
stages:
  - build
  - integration-test
Our current configuration consist of two sections. First we define the stages and then the definitions of the single stages. We will have two stages. The build stage and the integration test stage. In our build stage the application is build and packaged and the integration stage will execute testcafe and run our integration tests. The single stage configuration consists of definition how the runner is setup. First we have the used image. I mostly choose ubuntu:16.10 for convenience. In the script tag we will define what gets executed after the runner is setup and in the artifacts section we will declare artifacts which gets passed to the next state.
build stage
build:
 image: ubuntu:16.10
 stage: build
 script:
  - apt-get update -qq && apt-get install -y -qq build-essential libpng-dev maven openjdk-8-jdk-headless git
  - mvn -B verify
 artifacts:
  expire_in: 1 week
  paths:
   - target/testcafe-sample-0.0.1-SNAPSHOT.jar
To build our SpringBoot application we define a runner where first everything gets installed which is needed and secondly the application gets build. After the unit tests passes and the application is packaged we will provide the artifact to the next stage. See the artifacts section.
integration test stage
integration-test-ff:
  image: ubuntu:16.10
  stage: integration-test
  dependencies:
    - build
  script:
    - apt-get update -qq && apt-get install -y -qq dialog openjdk-8-jdk-headless xvfb npm nodejs-legacy firefox git
    - npm install -g testcafe@0.13.0
    - locale-gen de_DE.UTF-8
    - export LC_ALL=de_DE.utf8
    - export DISPLAY=:10
    - Xvfb :10 -screen 0 1366x768x24 -ac &
    - testcafe firefox src/main/integration-tests/* --app "java -jar target/testcafe-sample-0.0.1-SNAPSHOT.jar" --app-init-delay=10000
Now comes the fun part. The first line under script will install everything from the repository which we will need for our integration tests. So openjdk-8, xvfb, and nodejs gets installed. On the second line we will install testcafe. Since we don't have a display connected to our runner we will need a way to fake one. For this we have the great xvfb which will provide us with a simple display to run firefox in. Since my tests are run with de_DE as locale we first have to generate them and set the system up to use them. See
- locale-gen de_DE.UTF-8
- export LC_ALL=de_DE.utf8
The next line epxorts our display and the starts a xvfb server.
- export DISPLAY=:10
- Xvfb :10 -screen 0 1366x768x24 -ac &
and last we will call run our test and make use of two testcafe commands which also starting our application provided by the first build stage.
testcafe firefox src/main/integration-tests/* --app "java -jar target/testcafe-sample-0.0.1-SNAPSHOT.jar" --app-init-delay=10000See .gitlab-ci.yml for the whole file.
After everything is setup you can push your repository to gitlab and watch the build pipeline. If the build passed your commit will be flaged as passed and under the pipelines tab at gitlab you can find your passed build like the one shown here.

I hope I showed you a simple way of enhancing your development cycle and provided you a meaningful insight into building better applications. If you have any questions feel free to contact me.